Showing posts with label tag. Show all posts

Monday, 31 March 2014

Tim Holtz 12 Tags of 2014 - March


Uh Oh - scraping in under the wire with this one methinks!

This month Tim has demonstrated two different stamping techniques on his tag, the first being "smudge" stamping (where you deliberately smudge your still wet inked image to give a blurred vintage effect) and the second, using the smudge technique on second generation stamping (re-using your stamp after making the initial impression without re-inking your stamp, to give a softer less intense image - great for backgrounds).

You can see Tim's original Tag here.

Once again I was sans stash for this project but when I saw the freebie stamps that came with this month's Creative Stamping magazine, I couldn't 1.) resist and 2.) NOT use them for this project!

So here is my take on Tim's March Tag...


You see what I mean about the freebie stamps?


I haven't added any dimensional embellishments to my second generation tag as I plan to use it in a journal spread and want to keep it flat on the page.


My smudging didn't work particularly well, you can see it best on the tiny butterfly just above the reef knot.

The next two shots are just to illustrate the difference between first impression and second generation stamped images.


Tim's stamp set has a plain egg shape for the background and a second speckled stamp for the detail - mine didn't, but my index and little finger ends were the perfect size and shape!

Sorry I couldn't take any more shots, my camera batteries ran out :0(

Well that's it from me, off to post my link - I think I've still got time...

Sunday, 16 February 2014

February Calendar Girl


Hello and welcome friends!

I may have been away from blogland for a little while but I have been doing some crafting!

Mostly I have been altering tags, here is my February Calendar Girl tag, and I will post my February Tim Tag later in the week.


It being February it was inevitable that my Calendar Girl would have a Valentine's Day theme, but I decided to steer away from the traditional red and pink colour palette and go for black and white with some pops of red.

If you follow my blog you are probably aware that my crafting resolution for 2014 is to use up some of my stash rather than just collecting it. I've always tended not to use things, thinking that I should save them for a "special" project, but I'm making a real effort to get past that mental block and use my goodies if they work on a particular project .

The background is a white cardstock tag  (I used the Julie Nutting doll stamp packaging as a template) covered with Echo Park Yours Truly Love Notes paper which I stamped with a Craft Stamper (CS) freebie grungy heart stamp. I then randomly rubbed white acrylic paint over the tag with my finger to push the design right into the background. The edge is inked with Black Soot DI, but this reacted with the white acrylic to create a greyish smudge so I used another CS freebie, grungy border stamp and Jet Black Archival to stamp a random border. I used a black Sharpie to soften the squared off edge of the stamp.

The doll was stamped onto Neenah white cardstock and coloured with Copic markers. I made the mistake of stamping the image with Jet Black Archival ink, and even though I dried it thoroughly the stamped image has bled slightly where the Copics have touched it. Note to self - buy a black Memento ink pad!


Her dress is paper pieced from a Papermania 6x6 paper stack. I chose papers with the same design but with the colours reversed to emphasis the frill on her skirt. I used a coat of matte medium to seal her dress and then added shading with a black Pitt Big Brush pen. Some tiny red gems completed her outfit.


The gem swirl was made using a Bazzills InStitch'z template and some black Papermania Gems.


The heart border at the bottom is some decorative tape which I bought on-line thinking it was washi tape - It is actually a fairly glossy adhesive tape but it looks OK here. The LOVE bingo card is a Kaisercraft Miss Match stamp, stamped on white cardstock. The gorgeous red velvet rose is a Making Memories Vintage Hip Finding (a mega bargain from TKMaxx - I got 4 sets of these (two roses and three vintage style buttons) for about £3!) The black acetate flourish and heart are K&Co Elegance Die Cuts. I am using October Afternoon's Remember When calendar stamps for all my Calendar Girls, as each month is written in a different font, which I thought would add a bit of interest to the tags. February is stamped on a Memory Box Bistro Label die cut which has black inked edges.  You can see from the supplies I've used that some of this stuff has been in my stash for years - at last it is getting an airing!

Thank you for taking the time to visit - happy crafting!

Thursday, 23 January 2014

January Calendar Girls


Hello crafting friends and thank you for visiting.

I recently did an " In the spotlight" interview over at Our Creative Corner (OCC) (it's here if you want to read it), one of the questions was, "If you have lost your Mojo, how do you go about getting it back?"  Well, to be honest my Mojo went AWOL at Christmas and I've been in a bit of a crafting doldrums ever since. So, true to my interview response I've been looking around for sources of inspiration - and sometimes you get inspiration when you least expect it! - I recently picked up a copy of Creative Stamping magazine (mainly because I was drawn to the knife, fork and spoon freebie stamps - sad - but true!) A quick flick through the mag left me a bit disappointed - but then I'm not really a card maker - until I came across an article from the DT at Ali-Craft showcasing the Prima doll stamps - and then... Ding! - a light bulb moment and my personal 2014 challenge was born.

I am setting myself a "calendar girls" challenge - no silly, not the naked WI with strategic cakes style Calendar Girls, but a monthly themed tag featuring the Prima doll stamps  (or stamp singular - in my case!) I have also made the resolution to make a mega effort to use up some of my stash, so the current challenge over at OCC is perfect to get my newly returned Mojo back in working order!

The challenge is "No more shopping sins" (click on the link for details) and is an opportunity to use up some of the stash that's gathering dust in forgotten boxes and to confess your stash shopping sins and make a clean start in 2014.

So here is my January Calendar Girls tag...


I chose cold colours and a snowy theme to reflect the chilly weather we can have here in the UK in January.


It was fun pulling together various different stamps to make my cluster of embellishments - and of course I have unearthed some I'd forgotten I'd got!

So - to confess my stash shopping sins - I am a terrible sucker for a "bargain" - if it is vastly reduced in a sale bin and I think I may have a use for it at some point it will - almost inevitably - end up in my shopping basket!

Case in point with this tag - the self adhesive fabric ribbon and co-ordinating brad were in a sale of Dovecraft Christmas lines three or four years ago and have not been out of the packet until today.

Talking of ribbon - I just LOVE printed grosgrain ribbon - can't resist a pretty ribbon - OMG I'm SUCH a girl!

The Papermania ticket stamps were reduced to £2 in my local craft shop, the clock stamp was a freebie on a Creativity Magazine - can't resist a "freebie"!


The snowflake rub-ons (part of a set of glitter snowmen) were in a BOGOF (Buy One Get One Free) offer at The Works, again three or four years ago.

I must also confess that the Cuttlebug Swiss dots embossing folder had its maiden voyage in the making of this tag - and I've had that for donkey's!


Then there's the patterned paper - you know how that calls to you from the racks in the craft shop... so I'm pleased to be able to say that I have CUT INTO FOUR - that's FOUR, people, - different pieces of patterned paper from FOUR different stacks in the making of this project! (I needed a lie down with a cold compress afterwards mind you!)

Those of you who know your way around Julie Nutting's doll stamps for Prima will know that this is NOT one of Julie's designs. I had great fun (which really took me back to my childhood!) designing and making suitably warm attire for my January Girl.


I started by stamping the doll stamp (Doll No.2) on to white Neenah cardstock, loosely cut out my image and coloured in the face and neck with Copic markers.


I then stamped the image again on to copier paper and drew my "warm clothes" design over the top of the original image. 


I cut the pattern pieces out and used them as a template for making the finished clothes from patterned paper.

The new clothes were then glued over the top of the original stamped image and details such as creases and buttons were added with a fine black Pitt artists pen. A coat of matte medium made the surface of the finished doll non-porous and allowed me to add shading with Pitt Big Brush india ink markers.
                                                                                                                                                                

The final touch was to add a generous coat of Dimensional Magic (Glossy Accents equivalent) to the spotty wellies to give them a lovely "bang on trend" shine. Oh yes and those are supposed to be fluffy earmuffs - in case you were wondering :0)

So there you have it - my sins confessed and my project completed - and a head full of inspiration for February's tag too...

Wow - that was a long post - thanks for sticking with me - let me know you came and I'll try and catch up with you soon.

Hugs

Saturday, 11 January 2014

Tim Holtz 12 Tags of 2014 - January


Well - here we are with the first crafty finish of 2014. I've got to say that the old Mojo is still feeling a bit sluggish (no doubt the effects of way too much festive food!) and I'm struggling to find the inspiration to get in to the craft room and do some creating.

That said - I'm making a mega effort to keep up with at least the Tim Tag challenges (only managed 6 out of 12 last year - SHAME!) so here is my January 2014 tag...


You can see Tim's tag here.

As usual I had so few of Tim's chosen supplies that I had to come up with workarounds almost from the first step! My background colours are Weathered Wood and Old Paper DS and I've used Tim's Timeworks mask instead of the layering stencil - I quite like the result.

I used the large numbers from the 7 Gypsies Numero set, stamped with Black Soot DI to get an approximation of Tim's sanded rub-ons - I don't think it looks too bad!

Of course I don't have the fob watch die either so I've used the frame part of a Wendy Vecchi Art Part pocket watch covered in aluminium tape and a circle of cardstock similarly covered for the watch face. I was pleased with how well this worked and surprised by how easily the tape cut with a craft knife.


A couple of close ups...


Ooops - did my splattering at the wrong stage in the proceedings!


There are a few bits I'm not too happy with, but considering the lack of the supplies - it's not bad.

Hope to see you again soon.

Wednesday, 9 October 2013

WOYWW #227


Hello and welcome, how lovely to see you again.

The Moonshine Family seem to be all over the place at the moment with visits to University Open Days at the weekends, so I'm a bit behind with my crafting. (Still haven't stared my Dictionary J page which needs to be finished by Saturday and I haven't even thought about how I'm going to work around my TOTAL lack of TH supplies for the October Tim Tag.)

To tell the truth I've been a bit side tracked by the October challenge over at Our Creative Corner so that is what I'm playing with at the moment...


The challenge is a Halloween tag with texture, so it's out with the texture paste again. The tag on the left is my prototype, but I'm liking how they're both coming on.


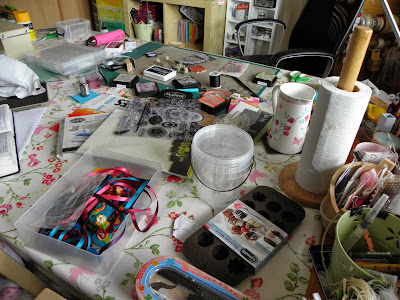
I thought I'd also post a shot from the "back side" of my desk. In the foreground you can see a silicone chocolate mould, which I'm planning on using for some Melt Art embellies, the makings for some felt key rings for my craft stall and two empty olive buckets for storing stuff, on the left you can just see my dictionary which is sending out "work on me" vibes and the rest is the paraphernalia for my tag.

That's all from me, short and sweet today. Thanks for stopping by and I'll catch up with you later.

Quick update - lots of comments about the windows on my tags - they're cut with the Small Gothic Arch die from Poppystamps. MMx

Wednesday, 18 September 2013

WOYWW #224

Hello fellow Deskers

I almost didn't post today as I had a dental appointment (boo hiss) this morning, but I've managed to get some crafting done in between a longer than expected appointment and the crazy school runs. So, what is on my workdesk today?


I'm working on my G entry for The Craft Barn's altered dictionary challenge - any guesses what my entry is going to be? (My dictionary is a French/English one but the word is similar in both languages.)

If you look quarter of the way down the left hand side of the photo (above) you can see a felt owl hanging from the lamp stand... I thought it would be fun to take an "owl's eye" view of my desk - so here it is...


Hmm, have you picked up that I quite like owls?

I must say a big THANK YOU to you all for your support last week when I was having a Tim Tag meltdown. I haven't thrown away my "failed" tags and will get round to re-loving them at some point but I thought you might like to see how my tag turned out..


It came good in the end (after I'd switched to Dylusions rather than DS!) 

And finally... C (aka Hammers) here are pics of my two bird house pincushions as promised...


(The spider's webs are a throw back to my school days - I used to doodle webs and spiders on everything - weird because I HATE spiders!)

Thanks for visiting and thanks to Julia for hosting (if you're not already a desker you're missing out - seriously!)

Thursday, 12 September 2013

Tim Holtz 12 Tags of 2013 - September


Once upon a time (30 or so years ago) I was a Girl Guide. I'm not ashamed to admit it, it's a big part of what has made me the independent and practical person I am today. 

When I was a Girl Guide we had a District Commissioner called Mrs Armstrong a lovely (very posh) lady for whom we all had affection and a great deal of respect. Mrs Armstrong was the lady who, apart from her role as Commissioner, tested us for our Camping Badge and the Commonwealth Badge for those few of us who became Queen's Guides. As such she was a stickler for things to be done - just so. Mrs Armstrong was  a "tough cookie" but she was also an inspirational leader whose words have stayed with me to this day. In a difficult situation she would always exhort, "Stick-ability girls! You must have stick-ability!" What she meant, of course, was that however difficult or frustrating a task is, you must keep at it until you've completed it, that you never give up.

Why am I telling you this? Because my September Tag has been an exercise in stick-ability. My completed tag is my fourth attempt at what should have been a pretty straight forward layered stencil technique (you can see Tim's Tag here). I really don't know why I had such a nightmare with this tag, but the problem came not with the layered stencils but with THE most basic step - Distress Staining my tag!

In the end I did admit defeat (I was running out of tags) and switched from DS to Dylusions spray inks and was MUCH happier with the results - I'm wondering if the root of the problem lay in the fact that I don't have a full arsenal of Distress Stains and the colours I do have just weren't working for me - who knows?

Anyway, I hope this explains the sentiment I've used on my tag, and you might notice the brass tag attached to the ribbon - a lucky find from my stash of random stuff!


I really like the effect of the honeycomb stencil on the seam binding.


I used a That Special Touch mica mask (swirls) inked with Gathered Twigs DI in place of Tim's Rays, I really like the effect of the subtle darker shade over the vibrant Dylusions. (Cherry Pie, Lemon Zest and Squeezed Orange)


Love that Cherry Pie ink, it looks great with the black stamping.

I'm pleased with the final result, so sticking at it definitely paid off!

Thank you for looking, please leave me a comment so I know you came and I'll try and visit you too.

Friday, 9 August 2013

Faux Batik (resist) Technique - Photo Tutorial - Part 1


Hello friends!

I had so many lovely comments about the faux batik tag I posted on Wednesday that I thought you might be interested in a quick tutorial. This post is photo heavy but I think it helps make sense of the technique.

I learned this technique at the monthly Art Journaling class I attend at Crafty Bunch in Telford so I must thank our lovely and super talented teacher Kaz Hall for kindly allowing me to share the technique with you. You may have seen some of Kaz's work in recent issues of Craft Stamper, if not pop over to her blog The Little Shabby Shed and check out her amazing work, she's a really lovely lady and always happy to welcome new visitors.

On with the show then...

Firstly a reminder of the sample tag I posted on Wednesday...


There are two things to keep in mind as you look at the tag, firstly the cardstock is manila cardstock (I'll come back to this later)  and secondly the photographs have been taken directly under a halogen bulb so you are seeing a very exaggerated sheen on the piece.


For the tutorial I am going to show you the same technique, but instead of on a tag it will be a background for a journal spread and will be on white cardstock, 

The idea behind this technique is to create a design which resists the coloured ink you are applying to make your background, leaving the design in the substrate (cardstock) colour rather than as a black or coloured stamped image.

You will need:

Embossing Ink (such as Versamark)
Clear embossing powder
Heat tool
Scrap or brown paper (not greaseproof)
Your chosen substrate, eg cardstock, tag, journal - a light colour will work best
Stamps and or stencils
Dylusions spray inks
A kitchen roll
Iron
Heatproof surface (eg craft mat)

Step 1.

Ink your chosen stamp with heat embossing ink and stamp the image on to your cardstock.  (You can also press the Versamark through a stencil. (Make sure you clean your stamps and stencils carefully afterwards as embossing ink is very sticky))


Step 2.

Pour clear embossing powder over your inked images. If you are doing a large project (mine is a double A4 spread) you may need to repeat steps 1 and 2 rather than do it all in one go so that your ink doesn't dry before you get your embossing powder on. I completed my stamped images in one step and then the stencilled images in another.


Shake off the excess on to a piece of scrap paper and return to the pot.


Don't worry if you have some specks of embossing powder floating around it all adds to the effect

Step 3.

Melt the embossing powder with a heat tool - enjoy the magic!


Step 4.

Working quite quickly, spray your inks randomly over your cardstock, you will get great blends where the colours overlap. You can also spritz with water to get the trademark Dylusions reaction look. Be careful not to over ink or you will get a very muddy colour.


Roll a full kitchen roll over the wet ink to take off the pooled ink before adding more colour in the spaces if necessary (this helps stop the muddiness). Repeat this again when you have finished inking to remove all excess ink.


You can see where the heat embossed images have resisted the ink.


Step 5.

Place scrap or brown paper over the cardstock (if using brown paper place it shiny side UP) and then iron over it with a reasonably hot DRY iron (DO NOT STEAM)


Eventually you will see "greasy" looking areas appear on the scrap paper, this is the embossing powder melting and being lifted off.


If, when you come to lift your scrap paper off, you find that it has become stuck, simply re-iron until it comes free.

Your finished faux batik piece will show your stamped/stencilled design in the colour of the substrate on a coloured  background.


You can then go on to decorate this further. In the tag above I have over stamped the same foliage stamp in black archival ink to make it pop and I've added some gold metallic dots around the leaves.

The technique followed was exactly the same for both samples but you will notice the two very different effects given by the colour of the substrate, the tag (manila) has given a lovely golden glow to the batik effect, whilst the journal spread (white) is quite a stark contrast. 

The sheen on the tag has come from sections of the embossing which haven't quite lifted off when ironed. You could experiment with different iron temperatures to see which effect you prefer. 

I do hope you will have a play at this technique,  all of my classmates really enjoyed trying it and we had some great - and surprising results.

I'm off to work on this page some more. Thank you for looking. Enjoy!


P.S. You can see how this page is coming on here
P.P.S. You can find Part 2 of the tutorial here


Related Posts Plugin for WordPress, Blogger...